What Æduin Did:
In 2020 my wife, Baroness Mary Taran of Glastonbury, OL showed me a website that led me down a rabbit hole and then into the shop. The site was Mistress Grace Gamble’s write up of a 16th Century Low Countries padded sewing box called a naaikussen:
You see, she said those fateful words, “can you make this for me?” Since I am a caring husband and a sucker I said, “I think so.” I was a bit nervous because it was the most complex thing I had attempted to make. Fortunately, Grace’s article was filled with lots of information and measurements.
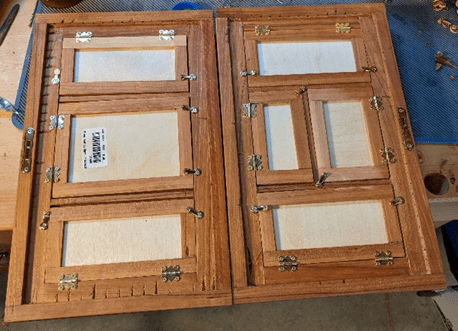
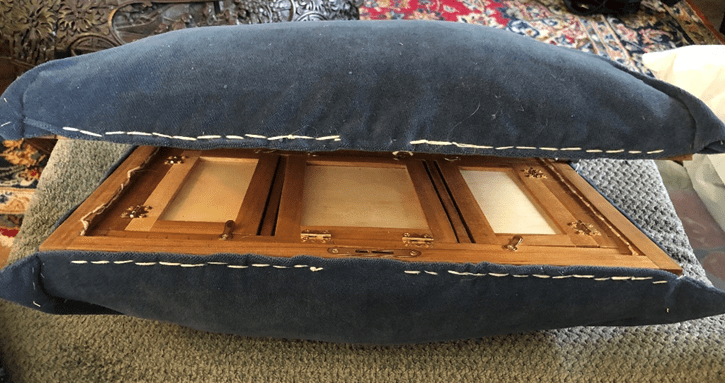
I built the inner box out of cherry with the top and bottom lids as well as the inserts for the panels out of 1/8” birch plywood. I used modern power tools for repeatability and precision, plus medical issues would have meant I’d still be working on it. I did use hide glue for assembly.
When looking at her drawings to plan my build I decided to make it like a puzzle and assemble it from the frame inwards. I built a cut list of how many pieces I needed of what sizes I needed then started milling the wood to size. Then I dry fit everything together to make sure that it all fit.
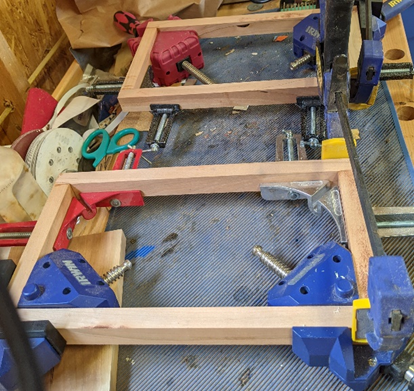
For glue up I used a piece of baking parchment on a flat piece of modern MDF as a flat assembly surface. Everything was glued in stages and any glue squeeze out was cleaned up between stages. First the outer frames, these were the simplest being only four pieces each but most critical since if they weren’t square and exactly the same size then it wouldn’t fit together when finished.
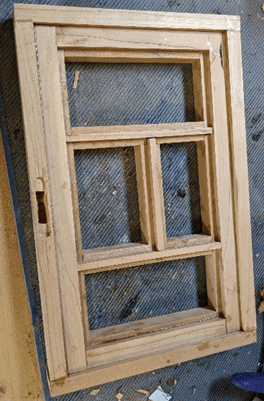
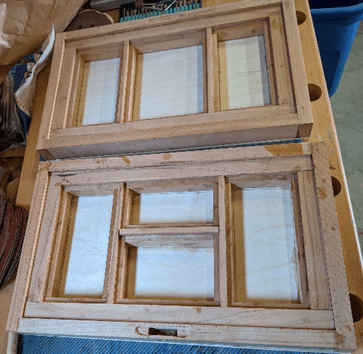
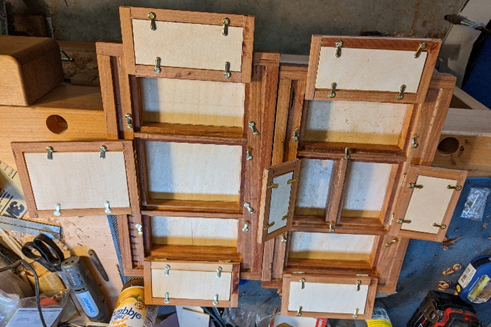
The inner sections were done in stages. The next layer where the compartment lids mount were cut to stagger the joints from the outer frame for maximum strength and glue surface. The inner layers/compartment dividers were cut and assembled in sections. The divider pieces are three pieces glued together, two the height of the lid supports and the middle one taller at the level of the lids to mount closures and hinges.
After all the pieces were assembled, glue was cleaned up, and the bottom surfaces were sanded I glued the plywood bottoms on. To make it more comfortable to use I rounded over the bottom edges so that if the stuffing ever shifted or compacted there wouldn’t be a sharp edge digging in to the user’s lap. After this I drilled the lacing holes around the perimeter.
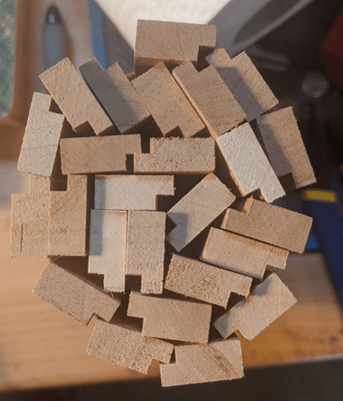
The frames for the compartment doors were the toughest part of the build because of how I made them. They are 1/4” thick with a 1/8” rabbet cut on the bottom to hold the panel. The rabbets were cut on the router table, thank goodness for modern tech and great safety equipment I had no worries about hurting myself. After the rabbets were cut I went to the table saw with a small parts cross cut sled to cut half lap joints in the pieces to join them together. I used half lap joints to maximize the glue surface. A butt or miter joint would not have had enough strength to hold the panels together. I had to re-make a couple of the panels, one three times, because I wasn’t happy with the fit.
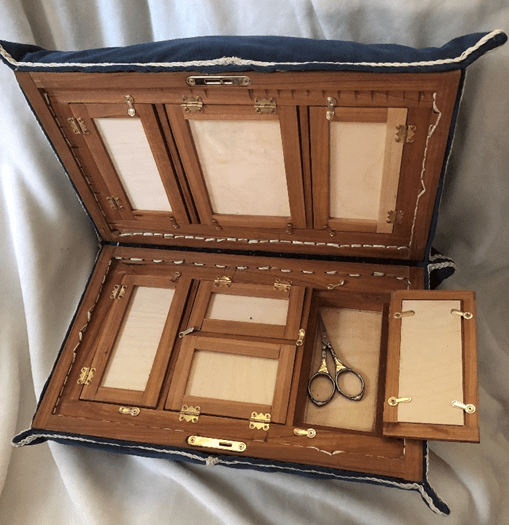
For hardware I used commercially available hinges, lock and picture frame tabs from WoodCraft or ordered online. The lock was mortised in and the escutcheon on the front was added after Mary did the soft work.
Things I would do differently if I ever made another. I would make the whole thing a little taller, especially the outer frame to have more room. This would also let the compartments have more room for larger tools, more threads etc. I would drill the holes on the drill press with an alignment jig before assembly for a neater appearance. It might turn out to be more fiddly and not worth it but I might get 1/8” stock and cut it to size and assemble the compartment lid frames that way. This could let me use a small amount of an exotic wood for the top layer to add some bling.
What Mary Taran Did:
Because I am much more confident in what my husband can do than he is, I asked for the “Impossible.”
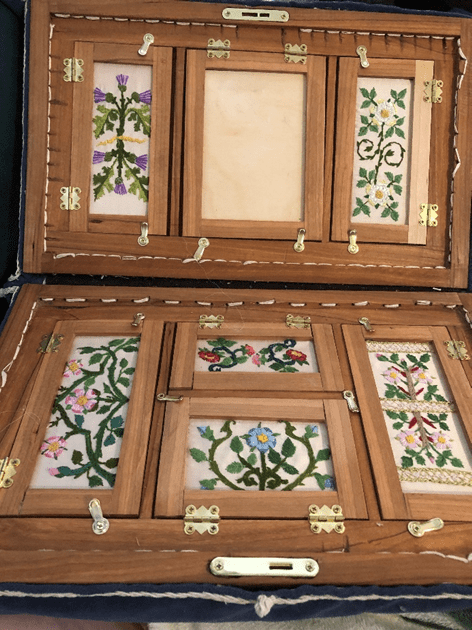
The naaikussen that Æduin built me had several frames that needed embellishment. A number of the period examples showed mirrors set in the center frame of the lid, which influenced the choice we made for that compartment. The rest were filled with embroidered panels. Originally, Æduin planned a highly polished brass insert to use as a mirror, but after several attempts to burnish it shiny enough and still resist tarnishing, we decided upon a glass mirror. Fortunately, the frame fit a standard sized mirror.
I have always loved the red embroidered Bible said to have been either owned or worked by Queen Elizabeth I, dated to 1583. The cover has several examples of vine patterns with flowers in the style of Tudor and Jacobean embroidery. I used this Bible as inspiration for the panels I embroidered. Each of the panels is my own design, in the style of said Bible cover.
I used a bit of peach colored mulberry silk shantung from my fabric bins, and flat and reeled silk flosses that I had sources several years ago from various Chinese and Indian vendors online.
After dressing my slate frame with the silk and a linen supporting undercloth, I drew my designs on tissue paper and basted them to the fabric sandwich. The designs were stitched with a variety of historic stitches, for example, stem, straight, outline, satin, spider, leaf, and French knot. Once the designs were embroidered, I picked out the remnants of the tissue paper.
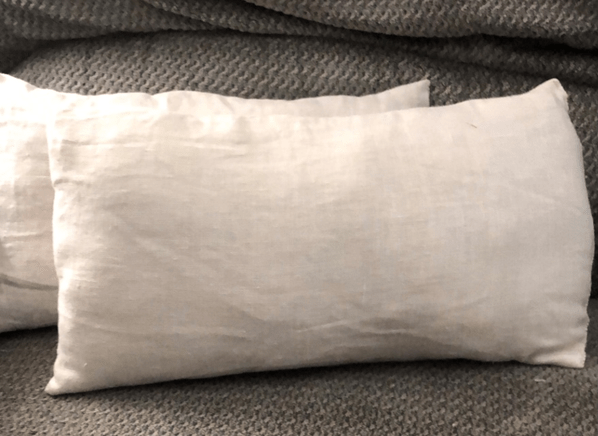
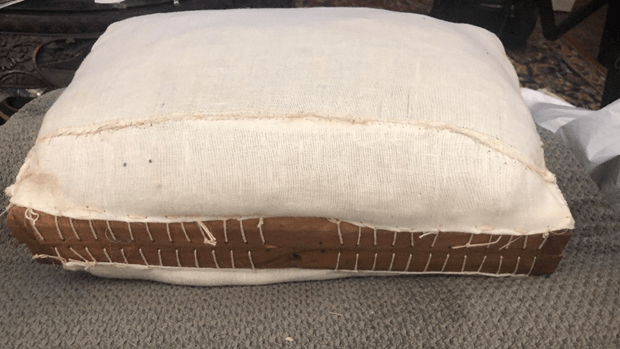
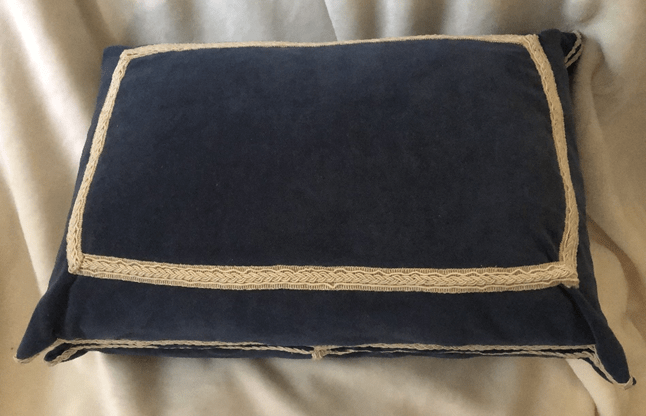
In gaps of time between embroidery sessions, I upholstered the box. The padding is hemp tow, packed firmly into pillows I made from lightweight linen. I then laced the pillows with a double strand of heavy upholstery thread onto the box through small holes made by Æduin for the purpose. I then pounded the pillow into the shape I wanted: domed, with sloping edges. Over that, I stretched heavy cotton velvet (scraps from my fabric bins) and laced it through the same holes. I dyed the lacing string to match the wood. I then deconstructed some gimp trim to cover the construction lines and to decorate the edges. The full gimp went along the edge where the slope started, and some tiny entredeux trim highlighted the corners. I made tassels from linen embroidery floss to trim the exterior corners of the box and to use as door pulls for the compartments inside.
The final step was to mount the embroidery and the mirror in the frames. I stretched the embroidered panels around the wooden backing board panels Æduin had cut to support them in the rabbets and backed them with some brocaded fabric, both to secure them and to add a padded surface to use as pin pillows. The doors lock closed by swinging the toggles in place. This finished the installation.
After using the naaikussen a few times, I realized that the lid had a habit of flopping open unexpectedly and suddenly, so I attached a movable tether chain.
The compartments are filled with sewing implements, both of period and modern style.
Included currently in the compartments are the following:
- Scissors with pincushion fob, tweezers, snips, thimble, knife sharpenter,
- Working project, silk floss, needles, embroidery hoop, rulers
- Built in pincushion on back of each compartment door
- Beeswax, nail file, bodkin, pencil
- Thread winders, bobbins, pin roll, hooks and eyes, needles, perfume
- Key to naaikussen lock (when box is unlocked), magnifying eyeglasses
- Needle minder, needle threaders, measuring tape, measuring gauge
- Marking pencil, seam ripper/stiletto, wooden seam presser, wooden awl, sticky notes
The naaikussen can be used to park needles, secure sewing projects that need some tension, bring a project in my lap up to a more comfortable working height, and rest my hands. I am considering using it as a bobbin lace pillow as well, if I ever resume that art form!
Things I would do differently if I ever made another: Instead of stitching through the tissue paper, I would transfer the designs directly to my silk.
Assembly and Progress Pics